The outcome
Create a workflow that another authorized machine can reopen and reproduce.
Step by step
A workflow you can repeat.
- 01
Install the official build, confirm hardware support, and start from a built-in workflow template.
- 02
Trace model loading, positive and negative conditioning, latent creation, sampling, decoding, and saving nodes.
- 03
Choose a licensed model and record its exact file, version, sampler, scheduler, seed, dimensions, and steps.
- 04
Change one parameter at a time and inspect outputs for artifacts, prompt adherence, and resource use.
- 05
Save the workflow JSON and an output with embedded workflow metadata, then document required models separately.
Interface reference
Connect the workflow to the product.
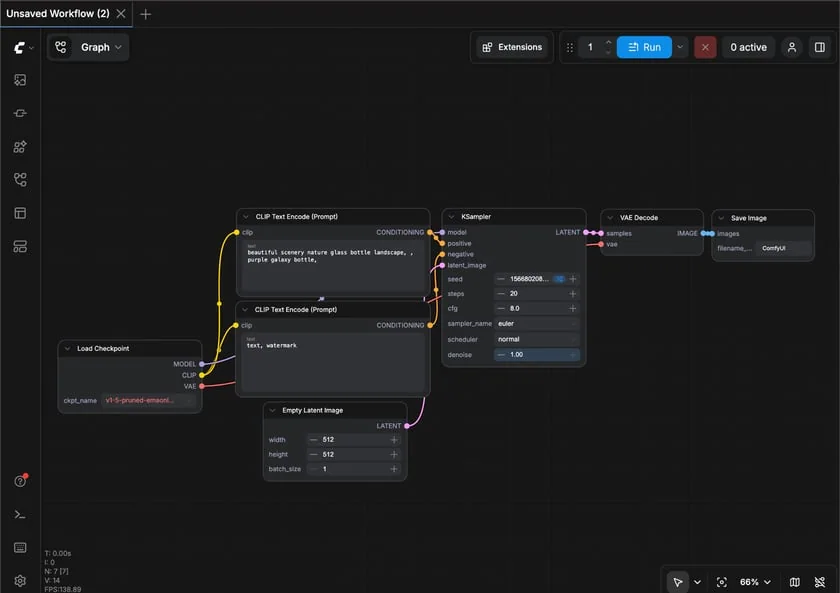
A basic ComfyUI text-to-image graph makes the model, prompts, sampler, decoder, and output path explicit.
Interface reference · ComfyUI first-generation documentation ↗ · Captured August 2, 2026Working standard
What good use looks like.
- Start with Core nodes.
- Pin models and settings.
- Change one variable per experiment.
Official references